Spring Security 를 실습하고 기록해보자.
Spring Security 란?
Spring 에서 제공해주는 보안 솔루션이다. 개발자가 직접 보완 관련 코드를 짤 필요없기 때문에 매우 간편하다. Spring Security 에서는 인증(Authentication) 과 권한(Authorization) 기능을 모두 제공하고 있어, 이 개념을 알아야 한다.
인증과 권한
인증(Authentication) 과 권한(Authorization) 을 살펴보면, 인증은 '나'='나' 라는 것을 확인하는 절차이고, 권한은 '나' 는 어느범위까지 사용이 가능한 지를 결정하는 것이다.
Spring Security 를 사용하는 이유
- Require authentication to every URL in your application
- Generate a login form for you
- Allow the user with the Username user and the Password password to authenticate with form based authentication
- Allow the user to logout
- CSRF attack prevention
- Session Fixation protection
- Security Header integration
- HTTP Strict Transport Security for secure requests
- X-Content-Type-Options integration
- Cache Control (can be overridden later by your application to allow caching of your static resources)
- X-XSS-Protection integration
- X-Frame-Options integration to help prevent Clickjacking
- Integrate with the following Servlet API methods
예제
예제 설명
Spring Security 를 이용하여 간단한 회원가입 / 로그인 기능 구현해보도록 하자. 이 과정에서 Spring Data JPA 도 사용되는데 이 주제는 다음에 다뤄보도록 하자.
총 4개의 화면으로 구성된다. + H2 Console 화면 (실제 사용자 정보가 저장되는 지 확인해보자)
- 로그인 화면
- 회원가입 화면
- 사용자 화면
- Admin 화면
총 6개의 package 로 소스코드를 관리한다.
- config
- domain
- repository
- dto
- service
- controller
시작
1. Spring project 를 하나 생성하자.
- Gradle
- Spring Boot 2.6.6
- Java 8
- Jar
2. 의존성 추가
dependencies {
  implementation 'org.springframework.boot:spring-boot-starter-data-jpa'
  implementation 'org.springframework.boot:spring-boot-starter-security'
  implementation 'org.springframework.boot:spring-boot-starter-thymeleaf'
  implementation 'org.springframework.boot:spring-boot-starter-web'
  implementation 'org.thymeleaf.extras:thymeleaf-extras-springsecurity5'
  compileOnly 'org.projectlombok:lombok'
  runtimeOnly 'com.h2database:h2'
  annotationProcessor 'org.projectlombok:lombok'
}
3. domain - Entity 정보 생성
@NoArgsConstructor(access = AccessLevel.PROTECTED)
@Entity
@Getter
public class UserInfo implements UserDetails {

	@Id
	@Column(name = "code")
	@GeneratedValue(strategy = GenerationType.IDENTITY)
	private Long code;

	@Column(name = "email", unique = true)
	private String email;

	@Column(name = "password")
	private String password;

	@Column(name = "auth")
	private String auth;

	@Builder
	public UserInfo(String email, String password, String auth) {
		this.email = email;
		this.password = password;
		this.auth = auth;
	}

	@Override
	public Collection<? extends GrantedAuthority> getAuthorities() {

		Set<GrantedAuthority> roles = new HashSet<>();
		for(String role : auth.split("," )) {
			roles.add(new SimpleGrantedAuthority(role));
		}

		return roles;
	}

	@Override
	public String getPassword() {
		// TODO Auto-generated method stub
		return password;
	}

	@Override
	public String getUsername() {
		return email;
	}

	@Override
	public boolean isAccountNonExpired() {
		return true;
	}

	@Override
	public boolean isAccountNonLocked() {
		return true;
	}

	@Override
	public boolean isCredentialsNonExpired() {
		return true;
	}

	@Override
	public boolean isEnabled() {
		return true;
	}

}
회원가입 시 [이메일, 패스워드, 권한] 이 저장될 것이다. 여러개의 권한을 가질 수 있고, 콤마[,]로 구분되어 저장된다. 로그인이 될 때 권한 리스트를 불러와 Spring Security 가 인식할 것이다.
한가지 주목해야 할 점은 UserDetails 라는 인터페이스를 상속받는 것이다. 이것은 Spring 제공 하는 것으로 인증과 권한을 담당한다.
4. repository 생성
public interface UserRepository extends JpaRepository<UserInfo, Long> {

	Optional<UserInfo> findByEmail(String email);

}
Repository 는 interface 로 생성하고 JpaRepository 를 상속 받는다.
5. dto 생성
@Getter
@Setter
public class UserInfoDto {

	private String email;
	private String password;

	private String auth;

}
6. service 생성
@RequiredArgsConstructor
@Service
public class UserService implements UserDetailsService {

	private final UserRepository userRepository;

	public Long save(UserInfoDto userInfoDto) {

		BCryptPasswordEncoder encoder = new BCryptPasswordEncoder();
		userInfoDto.setPassword(encoder.encode(userInfoDto.getPassword()));

		return userRepository.save(UserInfo.builder()
				.email(userInfoDto.getEmail())
				.password(userInfoDto.getPassword())
				.auth(userInfoDto.getAuth()).build()
				).getCode();
	}

	@Override
	public UserInfo loadUserByUsername(String email) throws UsernameNotFoundException {

		return userRepository.findByEmail(email)
				.orElseThrow(() -> new UsernameNotFoundException(email));
	}

}
UserDetailsService 를 상속받고 loadUserByUsername 오버라이드 함수를 사용한다.
7. config 생성
@RequiredArgsConstructor
@EnableWebSecurity
@Configuration
public class WebSecurityConfig extends WebSecurityConfigurerAdapter{

	private final UserService userService;


	@Override
	public void configure(WebSecurity web) throws Exception {
		web.ignoring().antMatchers("/css/**", "/js/**", "/img/**");
	}

	@Override
	protected void configure(HttpSecurity http) throws Exception {

		http
			.authorizeRequests()
				.antMatchers("/login", "/signup", "/user").permitAll()
				.antMatchers("/h2-console/**").permitAll()
				.antMatchers("/").hasRole("USER")
				.antMatchers("/admin").hasRole("ADMIN")
				.anyRequest().authenticated()
			.and()
            	.csrf()
                	.ignoringAntMatchers("/h2-console/**")
            .and()
            	.headers()
            		.frameOptions().sameOrigin()
			.and()
				.formLogin()
					.loginPage("/login")
					.defaultSuccessUrl("/")
			.and()
				.logout()
					.logoutSuccessUrl("/")
					.invalidateHttpSession(true);


	}

	@Override
	protected void configure(AuthenticationManagerBuilder auth) throws Exception {
		auth.userDetailsService(userService).passwordEncoder(new BCryptPasswordEncoder());
	}


}
WebSecurityConfigurerAdapter 를 상속 받는다. 세 개의 configure 메서드는 역할이 각각 다르다.
configure(WebSecurity web)
// -> static 하위 resource 디렉토리를 접근 불가한 리스트에서 제외할 수 있다.

configure(HttpSecurity http)
// -> http 관련 인증 설정을 담당한다.

    antMatchers // 경로 권한 설정을 담당한다.
        permitAll // 누구나 접근 가능
        hasRole // 기재된 권한이 있는 경우 접근 가능
        anyRequest // antMatchers 외 경로
        authenticated // 권한 있으면 접근 가능

    formLogin() // 로그인 설정
        loginPage("/login") // 로그인 화면
        defaultSuccessUrl("/") // 로그인 성공 시 이동할 화면

    logout() // 로그아웃 설정
        logoutSuccessUrl("/") // 로그아웃 시 이동할 화면
        invalidateHttpSession(true); // 로그아웃 시 세션 제거 여부

configure(AuthenticationManagerBuilder auth)
// -> 로그인 인증을 담당하고, 사용자 정보를 불러온다.
8. controller 생성
@RequiredArgsConstructor
@Controller
public class UserController {

	private final UserService userService;

	@PostMapping("/user")
	public String signup(UserInfoDto userInfoDto) {
		userService.save(userInfoDto);
		return "/login";
	}

	@GetMapping("/logout")
	public String logoutPage(HttpServletRequest request, HttpServletResponse response) {
		new SecurityContextLogoutHandler().logout(request, response, SecurityContextHolder.getContext().getAuthentication());
		return "/login";
	}

}
GET 메소드로도 로그아웃이 가능하다. SecurityContextLogoutHandler 을 사용하면 된다.
이제 View 화면을 구성해보자.
- login.html
- signup.html
- main.html
- admin.html
Controller에 등록을 해도 되지만, WebMvcConfigurer 을 사용하여 이동할 화면을 매핑을 해보자.
9. MVC config 생성
@Configuration
public class MvcConfig implements WebMvcConfigurer{

	@Override
	public void addViewControllers(ViewControllerRegistry registry) {

		registry.addViewController("/").setViewName("main");
		registry.addViewController("/login").setViewName("login");
	    registry.addViewController("/admin").setViewName("admin");
	    registry.addViewController("/signup").setViewName("signup");

	}
}
10. View 생성
login.html
<!DOCTYPE html>
<html>
<head>
<meta charset="UTF-8">
<title>Login</title>
</head>
<body>
	<h1>Login</h1> <hr>
    <img src="/img/info.jpeg" />

    <form action="/login" method="POST">
      <input type="hidden" th:name="${_csrf.parameterName}" th:value="${_csrf.token}" />
      email : <input type="text" name="username"> <br>
      password : <input type="password" name="password"> <br>
      <button type="submit">Login</button>
    </form> <br>

    <a href="/signup">Go to join! →</a>

</body>
</html>
signup.html
<!DOCTYPE html>
<html>
<head>
<meta charset="UTF-8">
<title>sign up</title>
</head>
<body>
	<h1>Sign Up</h1> <hr>

    <form th:action="@{/user}" method="POST">
      email : <input type="text" name="email"> <br>
      password : <input type="password" name="password"> <br>
      <input type="radio" name="auth" value="ROLE_ADMIN,ROLE_USER"> admin
      <input type="radio" name="auth" value="ROLE_USER" checked="checked"> user <br>
      <button type="submit">Join</button>
    </form> <br>

    <a href="/login">Go to login →</a>

</body>
</html>
main.html
<!DOCTYPE html>
<html>
<head>
<meta charset="UTF-8">
<title>Main</title>
</head>
<body>
	<h2>회원 전용 페이지</h2>
	ID : <span sec:authentication="name"></span><br>
	소유 권한 : <span sec:authentication="authorities"></span><br>

	<form id="logout" action="/logout" method="POST">
		<input type="hidden" th:name="${_csrf.parameterName}" th:value="${_csrf.token}" />
      	<input type="submit" value="로그아웃"/>
	</form>


</body>
</html>
admin.html
<!DOCTYPE html>
<html>
<head>
<meta charset="UTF-8">
<title>Insert title here</title>
</head>
<body>
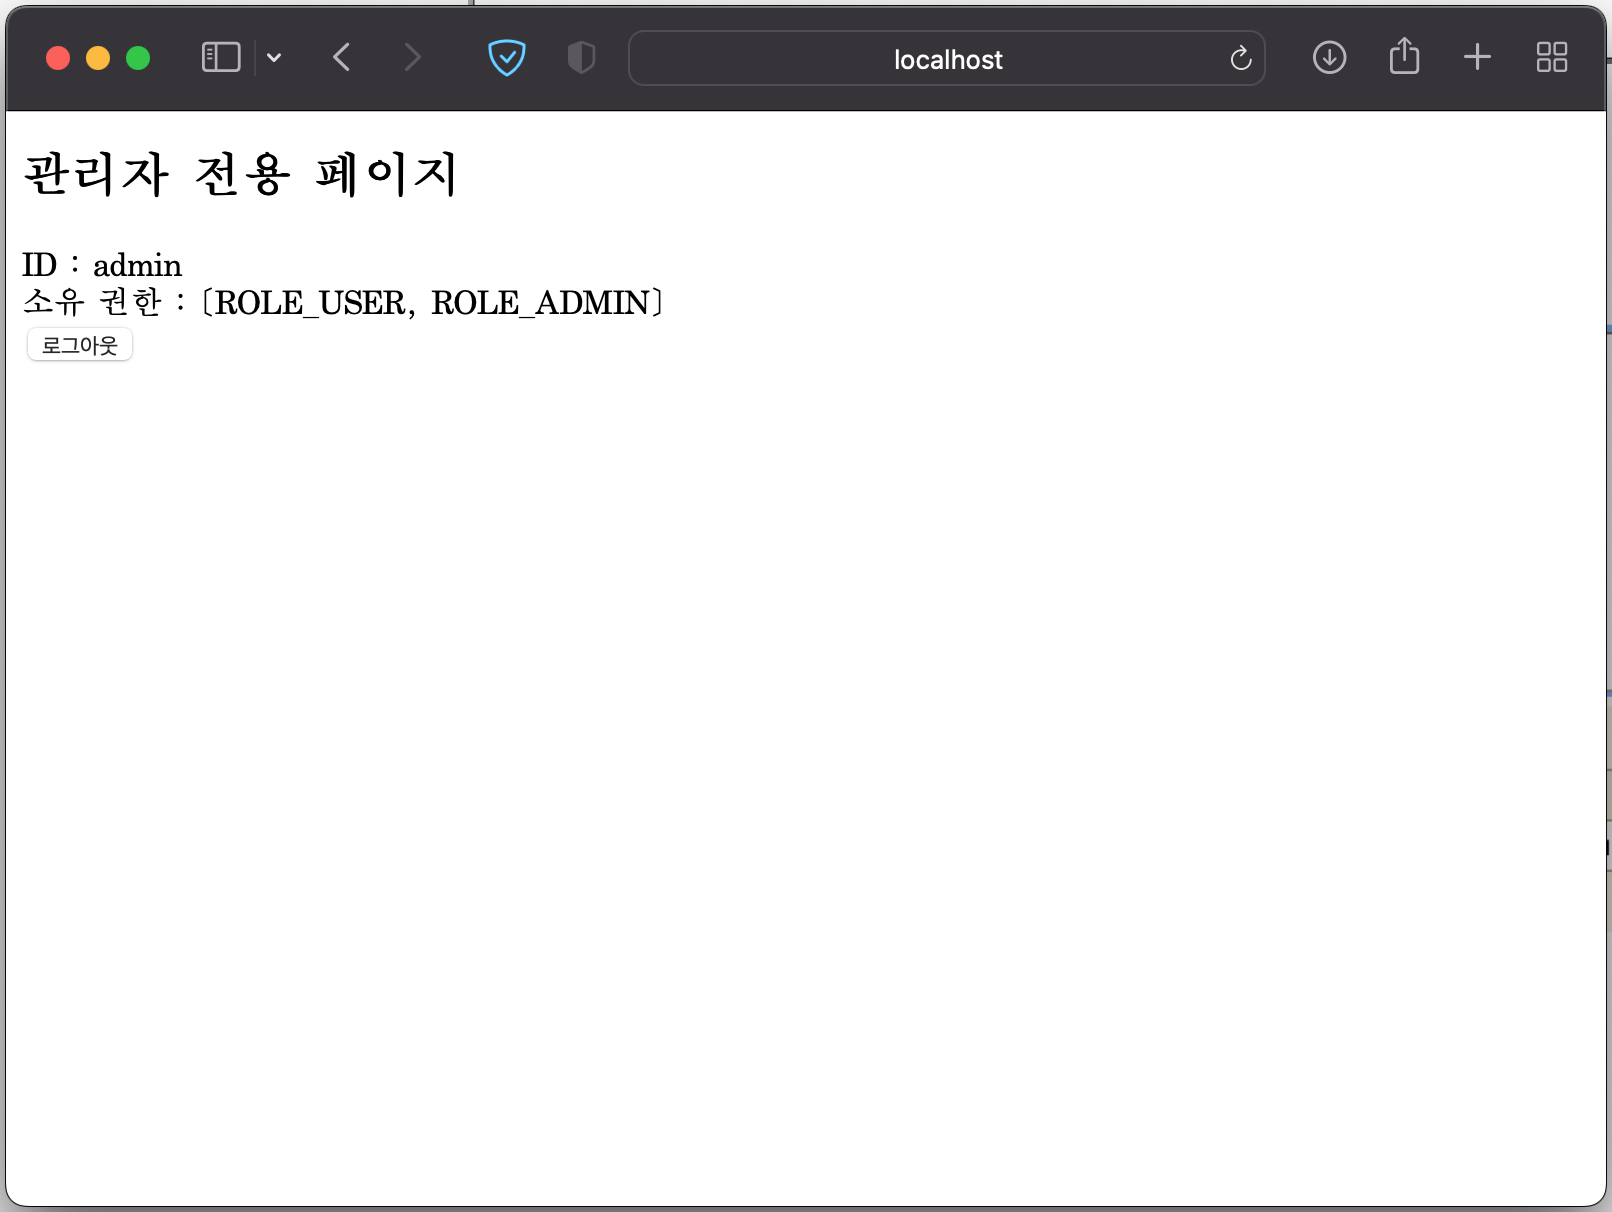
<h2>관리자 전용 페이지</h2>
ID : <span sec:authentication="name"></span> <br>
소유 권한 : <span sec:authentication="authorities"></span> <br>
<form id="logout" action="/logout" method="POST">
<input type="hidden" th:name="${_csrf.parameterName}" th:value="${_csrf.token}" />
<input type="submit" value="로그아웃"/>
</form>
</body>
</html>
11. Spring boot 실행
localhost:8080/ 접속하면 main.html 로 이동이 될 것이다. 근데 로그인 정보가 없으니 /login 화면으로 이동 됨.

사용자 정보가 없기 때문에 signup 을 해보자.
localhost:8080/signup

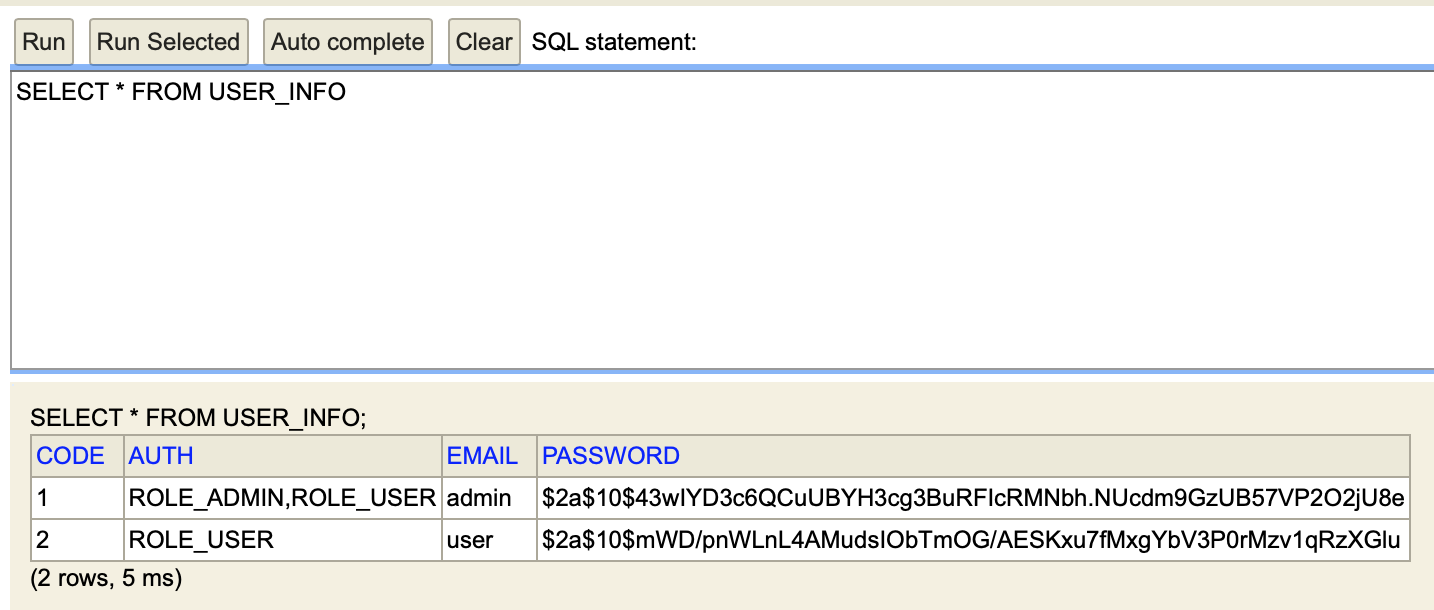
admin 을 선택하는 경우 DB 에 ROLE_USER, ROLE_ADMIN 두개가 들어간다.
H2 console 에서 조회해보면 아래와 같이 조회된다.

이제 로그인을 해보자.
ADMIN, USER 두 권한이 모두 존재하기 때문에, 회원용, admin용 화면 두 곳 모두 접속이 가능한 것을 볼 수있다.

로그아웃하면 다시 로그인 화면으로 이동한다.
다음으로는 사용자로 가입을 하고 화면 접근을 확인해보자.


localhost:8080/admin 으로 접속 시도 시 위와 같이 403 오류가 발생하는 것을 볼 수 있다.
이것으로 실습을 마치자..
Reference : https://shinsunyoung.tistory.com/78
'개발이야기 > Spring Boot' 카테고리의 다른 글
| Spring Boot JPA 게시판 - 글 등록/수정 (with MySQL) (0) | 2022.04.13 |
|---|---|
| Spring Boot JPA 게시판 - CRUD (with MySQL) (0) | 2022.04.11 |
| ORM (0) | 2022.04.03 |